
Introduction
I wanted a simple way to publish posts for free, keep everything in GitHub, and avoid turning a personal blog into a maintenance project.
After trying several tutorials, I found most were either too generic, skipped key prerequisites, or went far deeper than needed for a first working site.
This guide is the version I wanted when I started: practical, Windows-friendly, and focused on getting from zero to a live Hugo blog on GitHub Pages.
Prerequisites
This guide assumes the following:
- You are on Windows 10 or 11
- You are using PowerShell 7
- You want your blog source in GitHub
- You want a straightforward setup without unnecessary complexity
- You are happy using a simple theme like Tailwind
- You have a GitHub account (create one at https://github.com)
TL;DR
If you want the short version, the overall flow looks like this:
- Create a GitHub account and a public repo named
username.github.io - Clone that repo locally
- Install Git, PowerShell 7, Go, and Hugo Extended
- Create a Hugo site inside a
sitefolder - Add the Tailwind theme as a Git submodule
- Update
site/hugo.toml - Create an About page and your first post
- Add a GitHub Actions workflow
- Push to
main - Open
https://username.github.io
If you want the full step-by-step version, keep going.
Installation
Install Git
Git is required because the theme will be added as a submodule.
Download: https://git-scm.com/download/win
During install, select:
- Use Git from the command line and also from 3rd-party software
Verify:
|
|
Install or verify PowerShell 7
PowerShell 7 avoids the old BOM and encoding problems that can trip Hugo Extended up on Windows.
Download: https://learn.microsoft.com/powershell/
Verify:
|
|
Install Go
Go is required by some Hugo themes and build pipelines.
Download: https://go.dev/dl/
Verify:
|
|
Install Hugo Extended
Download Hugo
|
|
You can replace 0.160.1 with the latest version from Hugo’s GitHub releases page.
Extract Hugo
Once the download is complete, extract the zip file to a directory such as C:\Hugo:
|
|
Add Hugo to System Path
To make Hugo accessible from anywhere in PowerShell, add C:\Hugo to your user PATH.
|
|
Verify Hugo Installation
Open a new PowerShell window and run:
|
|
Confirm the output includes extended.
Create the GitHub Repository
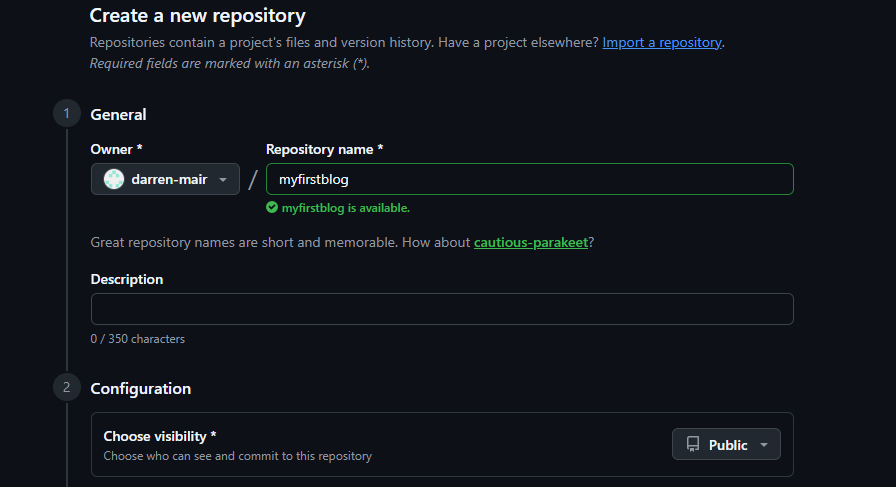
For a personal GitHub Pages site, create a public repository named:
username.github.io
Replace username with your actual GitHub username.
For example, if your username is scoobydoo, the repository must be:
scoobydoo.github.io
Clone the Repository and Prepare the Folder Structure
Open PowerShell 7 and run:
|
|
At this point your repository will hold the Hugo site inside a site directory, which keeps the root tidy.
Add a .gitignore
Create a .gitignore file in the repo root with:
|
|
Commit and push this early if you want to confirm your repo and local tooling are working.
Create your first Hugo site
Move into the site folder and create the Hugo project there:
|
|
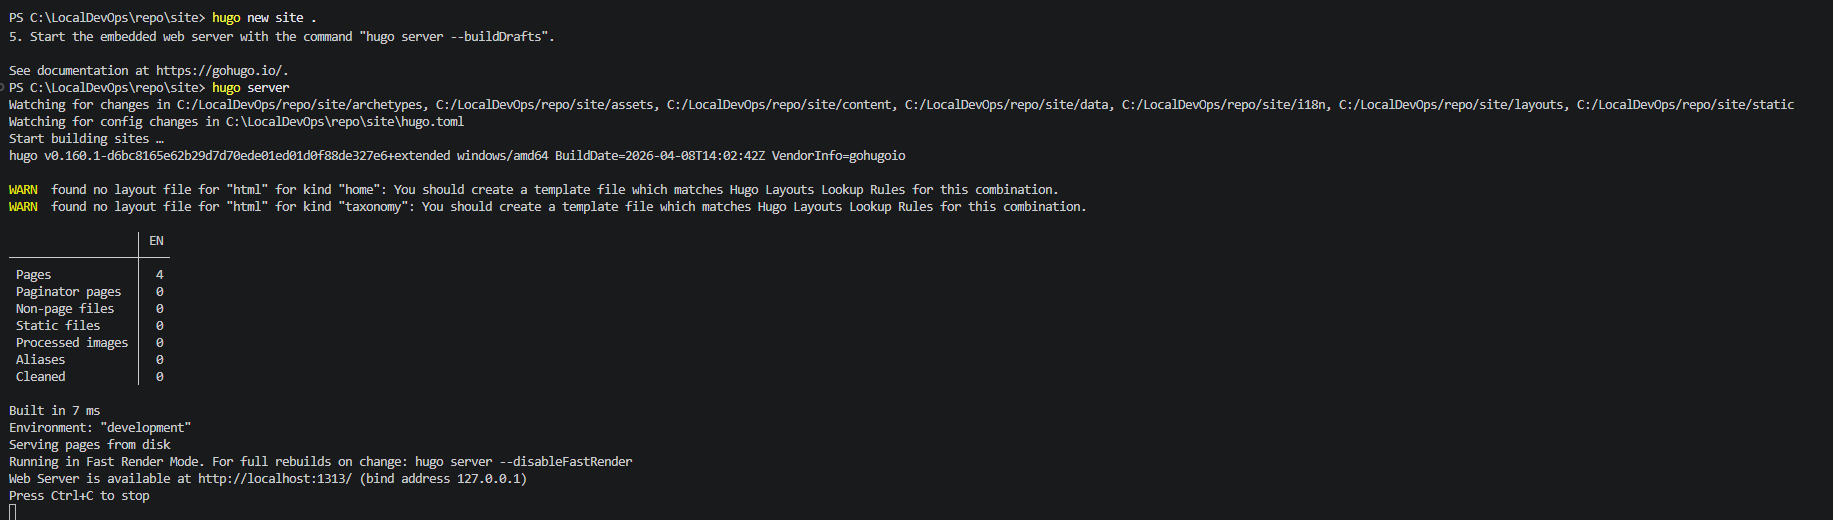
You can test the bare site immediately:
|
|
Hugo will print a local URL, usually:
http://127.0.0.1:1313
Add the Tailwind Theme
One of the reasons this setup works well is that the Tailwind theme stays simple. You are not taking on a heavy front-end toolchain just to publish a few posts.
From inside site, run:
|
|
Activate the Theme
Once the theme is downloaded, open site/hugo.toml.
Add the following line:
|
|
That also creates a .gitmodules file in the repository root.
It should look roughly like this:
|
|
At this point, if hugo server is already running, Hugo should detect the config and theme changes and rebuild automatically.
Create the About Page and Your First Post
|
|
Open site/content/about/index.md and replace the default content with your own details.
|
|
Create a blog post
Create your first post:
|
|
Then use front matter like this:
|
|
Then add your content below it, for example:
|
|
Each post should live in its own folder with an index.md file. That makes it easy to add images later.
Run Locally While You Write
From the site folder:
|
|
Open http://127.0.0.1:1313.
Check the following:
- The site loads locally
- Theme styling is applied
- Your About page is visible
- Your first post appears on the homepage
- Hugo rebuilds automatically when you save changes
Add GitHub Actions Deployment
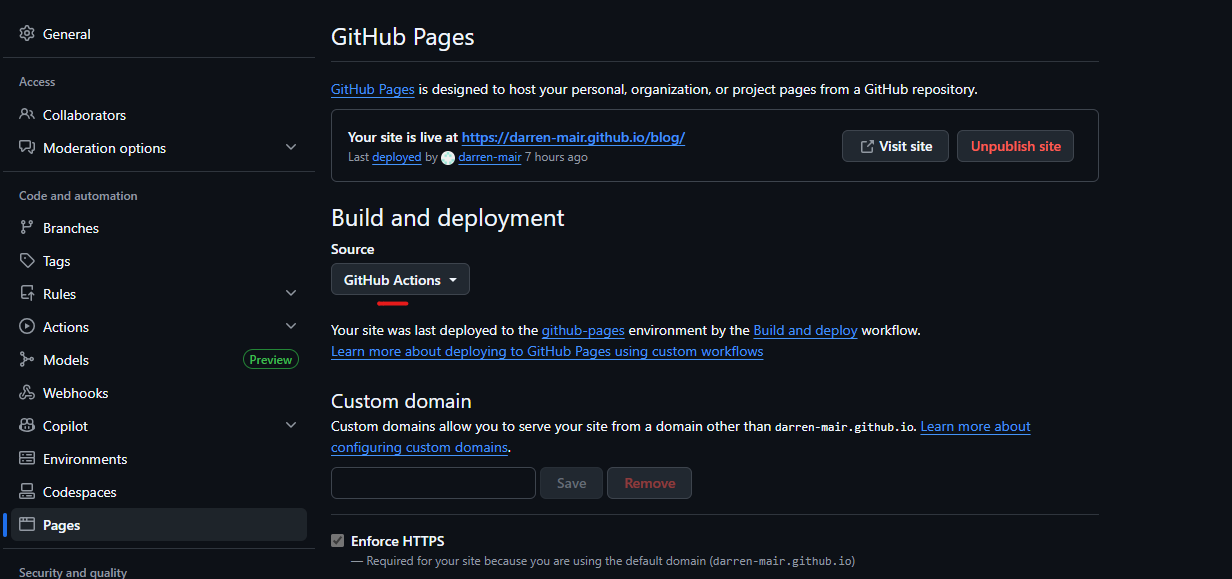
Once the blog looks right locally, set GitHub Pages to deploy from GitHub Actions.
In your repo:
- Go to Settings
- Open Pages
- Set the source to GitHub Actions
Then create .github/workflows/hugo.yml in the repository root with this workflow:
|
|
11. Commit, Push, and Publish
From the repo root:
|
|
Once the workflow completes, your site should be available at:
https://username.github.io
Verification Checklist
Before sharing or deploying, confirm all of these:
hugo versionincludes+extended- Hugo is version 0.160 or newer
Get-Command hugoreturns one intended binary pathhugo serverruns cleanly- The theme is applied locally
- The GitHub Actions workflow completes successfully
- GitHub Pages is set to deploy from Actions
- Your site opens at
https://username.github.io
Common Mistakes (And What They Cause)
| Mistake | Result |
|---|---|
| Editing config in Notepad | BOM can break parsing |
| Using Windows PowerShell 5.1 for file generation | BOM/encoding issues |
| Installing Hugo with Winget without checking version | Old or incorrect build |
| Using standard Hugo instead of Extended | SCSS fails |
| Multiple Hugo binaries in PATH | Version conflicts |
| Creating the wrong repo name | Your personal GitHub Pages URL will not work as expected |
| Forgetting to set Pages source to Actions | Workflow runs, but site does not publish |
| Leaving draft posts as drafts | Content does not show up on the live site |
Recommended Tooling
- Editor: VS Code
- Shell: PowerShell 7
- Theme strategy: Git submodules or Hugo modules
- Hosting: GitHub Pages via GitHub Actions
Optional Extras
Once the basics are working, the next things you might want to add are:
- A custom domain
- Better post images
- Analytics
- Comments
- A cleaner About page
- A reusable post template
- Local development in Docker Compose or GitHub Codespaces
Final Thoughts
Hugo can scale from a small personal blog to a much larger static site. That flexibility is great, but many guides try to teach everything at once.
If all you want is a simple blog that lives in GitHub, deploys for free, and stays easy to manage, this setup is enough to get you there without adding unnecessary complexity.
If you want, I can turn this into a shorter publish-ready version next, or add a matching follow-up post for Docker Compose or GitHub Codespaces.